
dt100 convert 6v to 12v kit instructions – Complete Guide for Reliable Electrical Upgrade
The topic of dt100 convert 6v to 12v kit instructions has become increasingly important among classic motorcycle owners who want better reliability, improved lighting, and compatibility with modern electrical components. The Yamaha DT100 originally came equipped with a 6-volt electrical system, which was common during its era. However, with time, riders and restorers have realized that maintaining a 6V system can be challenging due to limited part availability, weaker lighting output, and reduced performance when compared to modern standards.
Understanding dt100 convert 6v to 12v kit instructions is not only about changing voltage but also about preserving the originality of the motorcycle while improving functionality. Many enthusiasts want to keep the DT100 running smoothly without constantly fighting dim headlights, weak horn output, and unstable charging systems. A properly installed 12V conversion kit offers a balance between classic design and modern usability.
This article is written to serve as a complete reference for dt100 convert 6v to 12v kit instructions. It explains every step in detail, from understanding the stock electrical system to post-installation testing and long-term maintenance. Whether you are a beginner or an experienced mechanic, this guide will help you complete the conversion confidently.
Understanding the Original 6V Electrical System of DT100
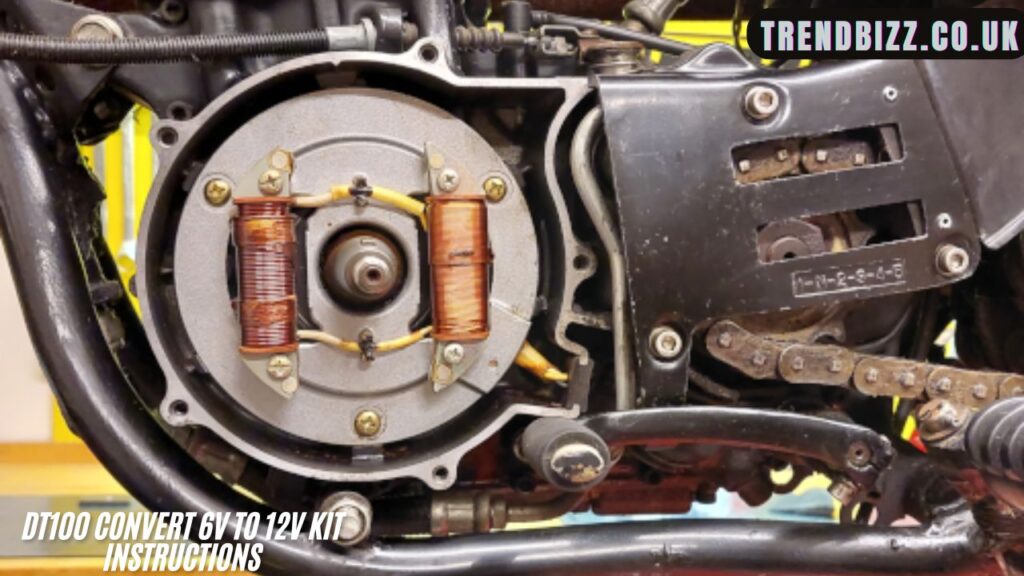
Before following dt100 convert 6v to 12v kit instructions, it is essential to understand how the original 6V system works. The DT100 uses a basic electrical setup consisting of a stator, rectifier, battery, ignition coil, lighting coil, and various bulbs designed for 6 volts. This system was sufficient in its time but struggles to meet modern expectations.
The 6V system produces lower voltage output, which results in dim headlights, flickering indicators, and limited charging capacity at idle or low RPMs. Battery health becomes a frequent issue because the charging system is not efficient enough to support additional accessories. Over time, corrosion and aging wiring further reduce performance.
By learning dt100 convert 6v to 12v kit instructions, owners can address these limitations without modifying the engine itself. The conversion focuses on electrical components, ensuring the motorcycle remains mechanically original while gaining modern electrical efficiency.
Why Riders Choose dt100 convert 6v to 12v kit instructions
There are several strong reasons why riders search for dt100 convert 6v to 12v kit instructions. One of the most important reasons is improved lighting. A 12V system allows brighter headlights and more visible tail and brake lights, significantly improving safety during night rides.
Another reason is parts availability. Finding 6V bulbs, regulators, and batteries is becoming increasingly difficult. In contrast, 12V components are widely available, affordable, and more reliable. This makes long-term ownership easier and less expensive.
Additionally, dt100 convert 6v to 12v kit instructions allow the use of modern accessories such as USB chargers, LED indicators, and electronic horns. These upgrades enhance daily usability without compromising the classic feel of the motorcycle.
Components Included in a Typical 6V to 12V Conversion Kit
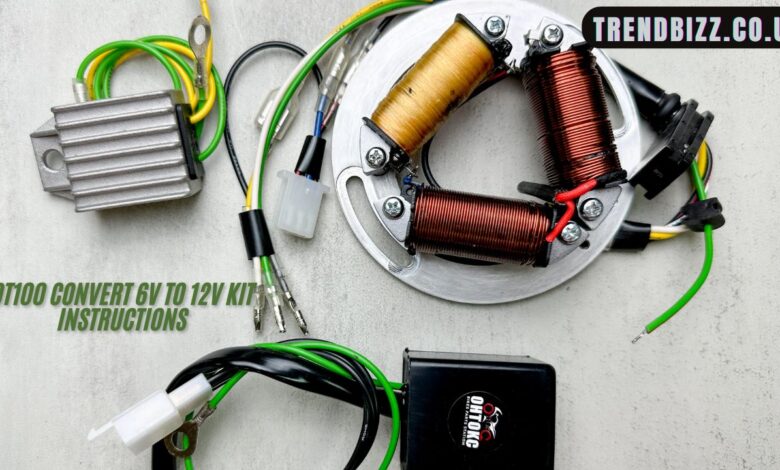
Understanding the components involved is a crucial part of dt100 convert 6v to 12v kit instructions. A standard conversion kit usually includes a 12V regulator-rectifier, a 12V battery, and sometimes a modified stator or rewound lighting coil. Some kits also include new wiring connectors to simplify installation.
The regulator-rectifier plays a key role by converting AC output from the stator into stable DC voltage suitable for charging the battery and powering accessories. The battery stores energy and ensures consistent voltage supply even at low engine speeds.
In addition to the main components, dt100 convert 6v to 12v kit instructions require replacing all 6V bulbs with 12V equivalents. This includes headlight, tail light, brake light, and indicator bulbs. The horn also needs to be replaced or modified to handle 12 volts safely.
Tools Required Before Starting the Conversion
Proper preparation is a critical part of dt100 convert 6v to 12v kit instructions. Before beginning the conversion, gather essential tools such as a multimeter, screwdrivers, spanners, wire cutters, and electrical tape. A soldering iron is recommended for secure wiring connections, though quality crimp connectors can also be used.
Having a wiring diagram of the DT100 is highly beneficial. While the conversion can be done without one, understanding wire colors and routing helps avoid mistakes. Clear labeling of wires during disassembly makes reassembly much easier.
Safety equipment should not be ignored. Wearing gloves and ensuring the motorcycle battery is disconnected before starting are basic but essential steps within dt100 convert 6v to 12v kit instructions.
Step-by-Step dt100 convert 6v to 12v kit instructions
The first step in dt100 convert 6v to 12v kit instructions is disconnecting and removing the original 6V battery. This ensures there is no live current during the conversion process. Once removed, inspect the battery tray and clean any corrosion.
Next, remove the original 6V rectifier and voltage regulator. These components are not compatible with a 12V system and must be replaced. Mount the new 12V regulator-rectifier securely, ensuring proper grounding to the frame.
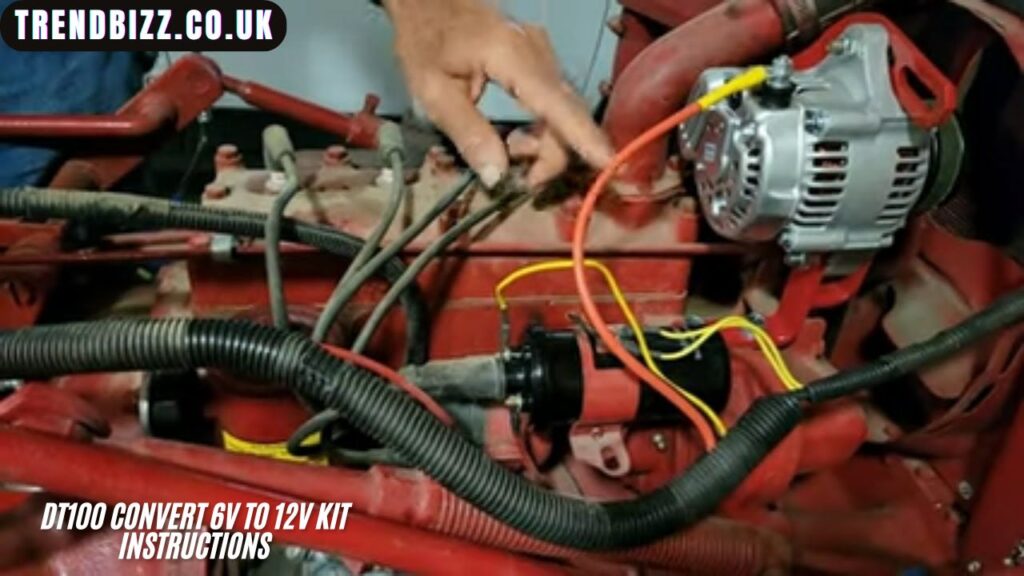
The stator wiring is then addressed. Depending on the kit, you may need to connect the existing lighting coil to the new regulator or install a modified stator. Follow the color-coded wiring carefully, as incorrect connections can damage components.
After connecting the regulator-rectifier, install the 12V battery in the tray. Ensure correct polarity when connecting the terminals. Secure the battery firmly to prevent vibration damage.
Once the power system is in place, replace all lighting components with 12V bulbs. This includes headlight, tail light, brake light, and indicators. The horn should also be replaced with a 12V unit.
Finally, inspect all wiring connections, secure loose cables, and reconnect the battery. These steps complete the core process of dt100 convert 6v to 12v kit instructions.
Testing and Verification After Installation
Testing is a critical phase of dt100 convert 6v to 12v kit instructions. Start the motorcycle and use a multimeter to check voltage at the battery terminals. At idle, voltage should be stable, and it should increase slightly when revving the engine.
Check all lights to ensure proper brightness and consistent operation. Indicators should flash at a steady rate, and the horn should sound strong and clear. Any flickering or dim output indicates a wiring or grounding issue.
Ride the motorcycle for a short distance and recheck connections afterward. This ensures that vibrations have not loosened any components. Proper testing ensures long-term reliability after completing dt100 convert 6v to 12v kit instructions.
Common Mistakes to Avoid During Conversion
One common mistake during dt100 convert 6v to 12v kit instructions is forgetting to replace all 6V components. Leaving a single 6V bulb in the system can cause immediate failure. Always double-check every electrical accessory.
Another mistake is poor grounding. A weak or corroded ground connection can lead to voltage fluctuations and unreliable performance. Ensure all ground points are clean and secure.
Incorrect regulator wiring is another issue. Always verify connections before powering the system. Taking time to follow dt100 convert 6v to 12v kit instructions carefully prevents costly errors.
Long-Term Benefits of a 12V Conversion
Completing dt100 convert 6v to 12v kit instructions provides long-term benefits that extend beyond brighter lights. Battery charging becomes more efficient, reducing the risk of sudden electrical failure.
Maintenance becomes easier due to readily available 12V components. Owners also gain flexibility to install modern accessories without overloading the system. These benefits make the conversion a worthwhile investment for daily riders and restorers alike.
Additionally, the resale value of a DT100 may improve when buyers see a professionally completed 12V conversion. It signals reliability and usability while retaining the motorcycle’s classic character.
Maintenance Tips After Conversion
After following dt100 convert 6v to 12v kit instructions, routine maintenance ensures long-lasting performance. Periodically check battery voltage and clean terminals to prevent corrosion. Inspect wiring for wear, especially near the steering head and frame joints.
Replacing bulbs with quality 12V components extends their lifespan. Keeping connections tight and protected from moisture helps avoid electrical problems. With proper care, a converted DT100 can remain dependable for years.

Final Thoughts on dt100 convert 6v to 12v kit instructions
The process of dt100 convert 6v to 12v kit instructions is a practical and valuable upgrade for any DT100 owner. It preserves the motorcycle’s heritage while enhancing safety, reliability, and convenience. By understanding the system, using the right components, and following each step carefully, the conversion can be completed successfully.
This guide has covered every aspect of dt100 convert 6v to 12v kit instructions in detail, ensuring that even first-time installers can approach the task with confidence. A properly executed conversion transforms the riding experience while respecting the classic nature of the DT100.